When it comes to outfitting your firearm with accessories, there is one category that is far more important than the rest. From foregrips to flashlights, there are countless options to accessorize your firearm to create exactly what you want. But the category that is perhaps the most important “accessory” is optics. Aside from your choice of what specific firearm and ammunition, your choice of optics will drastically impact the function and performance of that firearm.
Now, choosing the right optic system or scope for your desired use can be an extremely lengthy conversation with the right answer depending upon personal preference that will be saved for another time. However, we’ll skip to the part where you have decided on your scope and need some help figuring out the proper way to mount it. We’re going to answer all your questions on how to mount a scope and how to level a rifle scope.
So, you are looking to outfit a new hunting rifle for the next season, or you’re a shooter looking for your next favorite range gun? The way that your scope is mounted and leveled can be the difference between that trophy hanging on the wall (animal mount or competition trophy) or coming home empty-handed and frustrated. While some individuals choose to take their guns and scopes to a gun shop or gunsmith to have it done “right,” the truth is that if you follow some basic steps, you can do it yourself pretty easily.
Tools Required
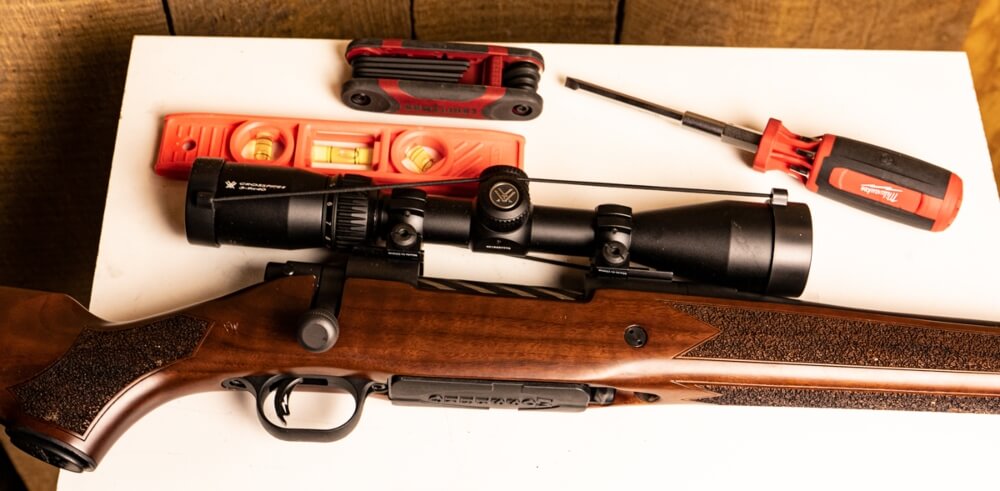
Before you start, there are a few tools and items that you need to have available in order to complete the job of mounting your rifle scope. Here’s the basic list that will suit just about any scope mounting:
- Rifle
- Scope
- Scope mounting base- this is sometimes optional on certain rifle models
- Scope rings- used to connect the scope to the rifle itself
- Degreaser- to clean the screw holes prior to attaching the base
- Gun oil- this will prevent rust from developing on the receiver of the gun
- Removable Threadlocker- it is imperative never to use a permanent thread-lock when mounting your scope
- Screwdriver
- Allen wrench (or Torx)
- Small level- this is extremely important!
The Scope & Pieces
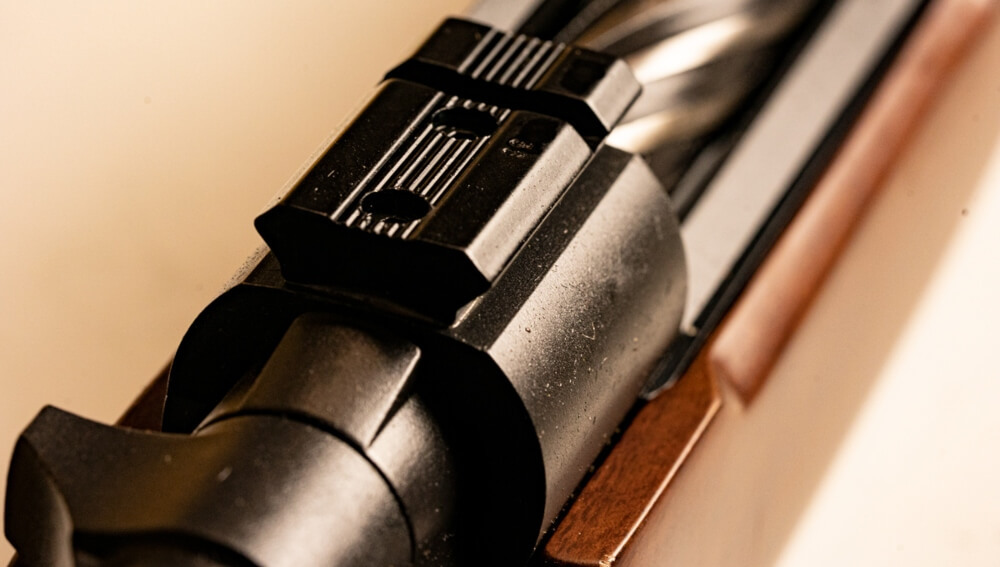
As mentioned above, we are going to stay away from the topic of picking out the right scope, but we will say it is important to keep in mind the saying, “you get what you pay for,” and this is especially true with scopes. We will, however, touch a little bit on the scope base that you may choose. A scope base can truly make the best scope function poorly and it is important never to take a cheap route when choosing your scope base. The big choice you will have to make is picking between one or two-piece bases.
- One-piece base- the biggest advantage in choosing this type is the stability that you will gain in keeping your scope leveled. For rifles that have significant recoil, a one-piece base can keep a heavy scope much more consistent shot after shot.
- Two-piece bases- the one positive aspect of choosing a two-piece base is the extra clearance available on a bolt action rifle. Whether you have to reload, clear a jam, or are wearing gloves, that extra space above the bolt can be handy.
- Two-piece bases are sometimes prone to coming out of alignment caused by the recoil of the rifle. Because the two pieces are separate, any slight misalignment can create torque on the scope and throw it out of position.
Proper Scope Mounting Steps
Prior to any installation, it is important that you first clean the mounting surfaces and remove any grease, debris or residue that may prevent the scope from sitting flush or that may allow the screws to come loose over time. Be sure to remove the plug screws from the top of the receiver in order to de-grease each screw hole. The next preparation step you need to take is making sure that your rifle is level, whether it in a vise or on a table, by using the small level that you have handy.
- Step 1– Base Mounting
- Prior to attaching the base, you will want to apply a thin layer of gun oil to any contact points between the receiver and the base. Depending on the material of the receiver and base, this will help prevent them from rusting from the elements or time.
- Next, we suggest using some removable Threadlocker (NOT PERMANENT) on the screws used to attach the base. Since the gun’s recoil can be strong, you want to make sure that the screws stay properly tightened as best as possible.
- Tighten each screw down until it is flush with the base to ensure an even attachment. Once the screws are all equal, go ahead and tighten them down.
- Be sure to check the receiver and bolt to ensure that no screws are protruding and impeding the rifle’s function.
- Step 2– Secure Scope Rings
- Disassemble the scope rings and attach the bottom pieces first. Place the scope in the scope ring bottoms and test that you can maneuver the adjustment knobs. Make any adjustments necessary.
- When tightening down the screws, be sure to push the rings as far forward on the closest rail in order to create the best attachment that will be resistant to the shock of recoil. Also, add a bit of threadlocker again to the screws and tighten by hand.
- Step 3– Eye Relief Setting
- To ensure the proper distance between your eye and the scope to eliminate the black halo that can be seen if the wrong fit, you will next shoulder your rifle and rest your cheek on the rest of the stock. Be sure this is how you plan on shooting your rifle in the field.
- Adjust the scope forward or backward in order to find your sweet spot. Don’t be afraid to adjust the bottom rings again if you need a little more or less room. You want to make sure that your vision in the scope is perfect.
- Once you find the right placement of your scope, go ahead and secure the tops of the scope rings evenly.
- Final Step– Leveling the Scope
- Take your small level and place it on the top adjustment knob. Make your adjustments until the scope sits perfectly parallel and perpendicular to your bore. This step is crucial for how your rifle will shoot when needing to correct for wind and elevation when it counts.
- Once the scope is seating in the right position for you, you can now tighten down each screw, similar to how you would tighten down a tire. This will ensure that the scope is attached evenly and remain in the proper position.
- Let the scope sit overnight to let the thread locker dry before you put any bullets downrange when sighting it in.
That’s all there is to it! Once you know the right steps to take, there really isn’t a need to take your rifle and new scope to someone else to mount it. Take your time and don’t skip any steps and you’ll be rewarded with a properly mounted scope.
Now that you know how to mount a rifle scope, get yourself some quality ammunition and head to the range to sight that new scope in. At AmmoForSale.com, we carry all the top brands with incredible prices. Winchester, Federal, Remington, Hornady, and many more brands are what you will find in just about every caliber available! Come check out our vast rifle ammo selection for your range, hunting, and shooting needs!


Leave A Comment